It’s time to get serious about ai.
Build Your Own AI Bidding Tool and Landing Page in 1 Weekend
PART FIVE
WISPR FLOW
Get your copy of Wispr Flow (free version) here. I will get credit for you signing up. This is a terrific tool for saving time and you get 2000 words per week for free.
You can see how I developed the Style Guide Tool in this Claude session.
Today: A simple daily tool to keep you on track. Just drag the index.html file to your browser. It will only clear when you do it, so refreshing during the day will not change it.
Idea Bank: A simple web-based tool that you can use to keep up with ideas you have. Simply drag the index.html page to a browser window. It will not clear until you clear it.
Everything you need is within these five pages, but this is a simple breakdown for making a tool and a landing page.
There are many ways to build the html tool (bidding, handling emails, etc….) The best way is below.
A Simple "About Me" file for your landing pages.
Use this Style Guide Builder to get your writing style guide. You may choose to use this information or not. If you do, put it last in the prompt window. All other prompts are entered, including the page text structure, then add this style .md.
Use this filled out:
- Full name
- Business name
- Website URL
- Location and the type of work I specialize in (food, product, lifestyle)
- My typical clients: small businesses, e-commerce – whatever you want to work in
- Tone I write in (warm and personal, clean and professional, etc.)
- Specific language you never use: Give it at least five words or phrases.
- Specific language you always use: Give it at least five words or phrases.
- Email, social handles, phone# if relevant
The site is full of great information; you should be able to find everything you are looking for in the four-page site.
This document is a simplified breakdown for you.
Getting the Text for Your Landing Page Here.
Put your “About Me” information or .md file here before you run the prompt.
We are going to write the copy for my landing page.
My landing page is to feature my food photography.I need:
A headline.
A subheadline
An Introduction: 2-3 paragrpahs about what I do and why I should do it for them.
Copy for Card One
Copy for Card Two
Copy for Card Three
An intro to testimonials (there will be three)
A call to action.Write the copy and we will edit from there.
Ask any questiions you have before proceeding.
Response should have the copy clearly defined:
Headline Copy:
This is where the headline copy goes
Subhead Copy:
This is where the subhead copy goes.
And so forth.
This will create the copy for your landing page. Feel free to add more to it, but know where it will go in your brief.
(For instance, you can make six cards, but you may have to add cards 4, 5, and 6 manually in the prompt if you use the Brief Builder you now have on your desktop.
The brief builder will have all of your design decisions in it as well as the structure for your page.
It will also give you the final output for your Claude design prompt.
We Built a Real AI Tool. Here’s Exactly How We Did It.
A few hours ago you had an idea and a blank browser tab. Now you have a working tool that talks to Claude, knows who you are, and writes photography bids while you drink your coffee.
That’s not nothing. That’s actually a lot.
This post is the wrap-up. It covers the whole arc from concept to working file, including how to get your API key set up and what to do when something doesn’t work. Keep it. You’ll want to come back to it when you build the next one.
Step One: Conceive the Tool
Every tool we built in this workshop started with one honest question: what do I do over and over that follows a pattern?
For photographers, bidding is exactly that. Every quote involves the same information: your rates, your copyright terms, your turnaround, your travel policy. The only thing that changes is the client’s request. That’s a pattern. And patterns are exactly what AI tools are good at.
Before writing a single line of code, the question to ask is:
What does the tool need to know that never changes?
And what does it receive fresh each time?
The stable stuff becomes your profile. The fresh stuff becomes the input field. Everything else is output.
For our bid tool:
- Stable: your name, rates, copyright model, specialties, delivery terms
- Fresh: the client’s request
- Output: the bid, the email sequence, the objection-handling prompt
Once you can answer those three things, you have a tool. The rest is just building it.
Step Two: Talk It Through With Claude Before You Build Anything
This is the step most people skip, and it’s the one that saves the most time.
Before I asked Claude to write any code, I described what I wanted and asked two questions:
What am I missing? and How should this be structured?
What came back was a real conversation about architecture. We talked through the 30-second API timeout problem. We decided to split the bid and the email sequence into two separate button actions instead of one giant call, which keeps each request fast and focused. We talked about where to store the API key (the browser’s localStorage, since this tool never goes public). We decided against building a server at all.
That conversation shaped everything. The tool you built today is cleaner and faster because of decisions made before any code existed.
The lesson: Claude is not just a code writer. It’s a thinking partner. Use it that way first.
Step Three: Get Your API Key
To talk to Claude from your own tool, you need an API key. This is different from your Claude.ai subscription. Think of it as a direct line to the model that you pay for by usage rather than by month.
Here’s how to get one:
- Go to console.anthropic.com and sign in or create an account.
- Click API Keys in the left sidebar.
- Click Create Key, give it a name (something like “Bid Tool”), and copy the key immediately. You only see it once.
- Paste it into the tool’s API key field when you first open it.
The key starts with sk-ant-. If it doesn’t look like that, something went wrong in the copy.
A note on cost: The API charges per token, which is roughly per word processed. A full bid plus email sequence costs a fraction of a cent. You’re unlikely to spend more than a few dollars a month using this tool regularly. You can set spending limits in the console if you want a ceiling.
One important rule: Your API key is essentially a password. Don’t paste it into emails, don’t put it in a public GitHub repo, and don’t share the HTML file with anyone, because the key is saved in the browser tied to that file. For a private local tool only you use, it’s perfectly safe sitting in localStorage on your machine.
Step Four: Understand What You Actually Built
The tool is one HTML file. You open it by dragging it into a browser window or right-clicking it and opening it in your browser. No server. No installation. No app store.
When you open it, it reads your saved profile from the browser’s memory (localStorage). It builds a system prompt from that profile. Every time you click Generate Bid or Email Sequence, it sends that system prompt plus your client’s request directly to the Anthropic API and displays what comes back.
The system prompt is the part that makes this work. It tells Claude everything about you before it reads a single word of the client brief:
This is similar to what Claude will be doing behind the scenes:
You are a professional photography bid writer working on behalf of Jane Doe Photography.

Rates: Half-day $800. Full day $1,500. Rush: 25% surcharge for under 72-hour turnaround.
Travel: First 30 miles included, $0.70/mile after.
Copyright: Limited non-exclusive license by default. Full transfer available at 3x shoot fee.
...
Claude doesn’t have to guess. It doesn’t have to ask. It already knows. That’s why the output sounds specific to your business rather than generic.
We asked Claude for a download button, and a modify button for the produced prompt. You may have to also ask it for a plain text prompt as well.
The objection-handling section at the bottom doesn’t make an API call at all. It generates a pre-written prompt you copy and take straight to Claude.ai. That keeps the tool simple and lets you add context before sending.
Step Five: Troubleshooting
Here are the problems people ran into today, and how to fix them.
The tool opens but nothing happens when I click Generate Bid.
Open your browser’s developer console (right-click anywhere on the page, click Inspect, then click the Console tab). Look for red error text. The most common culprits:
- 401 Unauthorized — your API key is wrong or wasn’t saved. Click “Edit profile” and re-enter it carefully. Make sure there are no spaces before or after the key.
- CORS error or blocked request — this happens if you’re trying to run the file through a server that strips the required browser-access header. Open the file directly from your file system (the address bar should start with
file://, nothttp://). - Nothing at all — the client request field is probably empty. The tool checks for content before firing.
The output cuts off mid-sentence.
The API has a token limit per response. The tool is set to 1,000 tokens, which handles a full bid comfortably. If your profile fields are very long, the system prompt takes up more of that budget. Try trimming your profile answers to the essentials.
The response doesn’t sound like me.
Go back to your profile and look at two fields: your one-line description and your licensing model. Those two fields do most of the work in shaping the tone. Write them the way you’d actually say them to a client, not the way you’d write them in a contract. Claude will match your register.
I got a bill from Anthropic I didn’t expect.
Check console.anthropic.com and look at your usage. API calls from this tool are very cheap, but if the key got shared or exposed somewhere, it’s possible someone else used it. Revoke that key immediately, create a new one, and update your tool. You can also set a monthly spending limit in the console under Billing settings.
The tool lost my profile.
localStorage is tied to the browser and the file path. If you moved the HTML file to a different folder, or if you cleared your browser’s site data, the profile would be wiped. The fix is to go through the questionnaire again. Going forward, keep the file in a stable location and don’t clear site data for local files.
It is a good idea to have a backup of your saved data (the always on profile information) in an easy to find place. I use Notes on my Mac.
What Comes Next
You now understand the pattern well enough to build other tools with it.
The same architecture works for any repeating professional task where your context stays constant and only the input changes. Estimate generators. Client intake summaries. Contract first drafts. Caption writing for a specific brand voice. Anything where you find yourself typing the same context over and over is a candidate for this approach.
The blueprint from this workshop covers every component: the design system, the API call structure, the profile-baking pattern, the localStorage setup. It’s worth keeping alongside the tool itself.
The other thing worth holding onto: the conversation you had with Claude before building anything was part of the process. That’s not cheating. That’s how this works. The best tools we built today came from people who pushed back, asked follow-up questions, and changed things that didn’t feel right. The model is there to help you think. Use it that way.
Building a Landing Page or a Client Bid Page
The brief is doing most of the work before a single line of code gets written. That’s the core of it.
When your students built those pages, they probably felt like they were just “filling in a template,” but what they were actually doing was making hundreds of micro-decisions in advance, in plain language, before handing off to a tool that thinks in code. That separation is what made it work.
The brief as a design document
A good brief forces you to resolve conflicts before they become CSS problems. Color relationships, hierarchy, tone, which sections exist and in what order — those are design questions, not technical ones. When someone has to write “elegant gallery modern” and “warm golden bronze” and “Van Gogh blues,” they’ve already made the hard call about whether this page feels like a steakhouse or a wedding photographer. The tool just executes that call.
Most failed landing pages fail at the brief stage, not the build stage. The person never decided what the page was for, so every section is vague.
Structure before style
The section order in the brief — header, intro, cards, testimonials, CTA — is a persuasion sequence. It’s not arbitrary. You’re taking someone from “what is this?” to “I trust this” to “I want this.” That sequence works because it mirrors how people actually evaluate a service provider. Style choices (the dark palette, the ornate frames) make the page memorable, but they don’t change the logic of the sequence.
Specificity as a forcing function
Notice that the copy in the brief wasn’t placeholder text. “Dishes shot to match how they actually taste” is a real sentence with a real point of view. When your students had to write actual body copy before building, they couldn’t hide behind “lorem ipsum and we’ll figure it out later.” The copy forced clarity about who the client is, what they offer, and who they’re talking to.
What to do next time
Three things will predict whether their second page is better than their first:
First, write the copy before touching any design tool. Not an outline, the actual sentences. The copy will tell them what sections they need, not the other way around.
Second, make one strong aesthetic decision early and let everything else serve it. This is where you create your design text (the .md file – remembering to make it only as long as it needs to be.)
Third, treat the CTA as the destination, not an afterthought. The whole page is a ramp that ends at one moment of action. If the CTA is weak or the page doesn’t build toward it, all the earlier work is wasted.
Ask yourself: if someone reads nothing but the headline and the CTA button, do they understand what to do and why?
The methodology, stripped down: decide what you’re saying, decide how it should feel, write it out, then build it in that order. Don’t reverse-engineer the copy from a template. The template should feel like it grew from the copy, not the other way around.
Have the AI create the file from your inputs:
Your simple bio needs (About Me) information
Design Information (design .md)
The structure of the site
Header
Introduction
Three Cards (or Six Cards)
Testimonals (three?)
Call to Action
Important Links
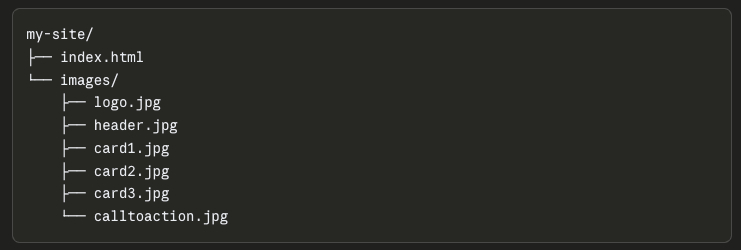
Instruct Claude that the images will be in an “images” folder in the home directory with the index.html file. Also let it know that the images will follow this structure:
Download the folder.
Create a new folder inside the main folder and put your images there.
You will now see the design with the images.
You can now change the images by uploading new images with the same file name.
Narrow the browser window to see how it will render on a phone.
Below is a repeat of what is found on page four, but it is here for quick recall
PROMPTS FOR THE CLASS
Prompt for Emails:
- Your name and business name
- Who is the other party, and what is your relationship with them?
- What is the problem or project?
- What outcome do you actually want?
- What have you already tried?
- What was the response or pushback?
- How urgent is this? (Hot / Medium / Cool)
Create a simple prompt for letting Claude know who you are.
- Full name and business name
- Location and the type of work you specialize in (weddings, commercial, portraits, etc.)
- Their typical client (luxury brides, small businesses, families)
- Tone you write in (warm and personal, clean and professional, etc.)
- Any specific language you always or never use
- Website URL and social handles if relevant
- Email address
A Simple Contextual Prompt Lead:
“Here’s my background for context: I’m [Name], owner of [Business]. I photograph [specialty] in [location]. My clients are typically [description]. My writing tone is [description]. My website is [url].”
Writing the Design Tool
This is the brief. A good .md file covers:
- What the tool does in one clear sentence
- The input fields (what the user types in)
- What the output should look like (format, sections, tone)
- Any calculations involved (hourly rate, usage fees, licensing, expenses)
- Design preferences (clean, simple, their colors if they have them)
- Any edge cases or rules (minimum job fee, travel threshold, etc.)
The .md file is what separates a tool that works from one that almost works.
The more specific it is, the less back-and-forth is needed in the build.
MAKE SURE TO ACQUIRE AN API FROM CLAUDE FOR THIS TOOL TO WORK.
The sequence then becomes:
- Find a screenshot of a UI you like
- Claude generates the .md from it
- Strip it to the essentials
- Build the prompt that powers it
- Claude builds the HTML tool from both
Sample Secondary Style File:
# Writing Style Guide
##Voice
Write in first person. Short sentences. No more than two clauses per sentence. Use plain language. If a simpler word exists, use it.
## Audience
Software developers reading a personal blog. They are technical but skeptical of hype. Do not explain basic concepts. Do not oversell anything.
## Constraints
– No bullet points unless the content is genuinely a list
– No section headers unless the piece is over 800 words
– Never use: “game changer,” “deep dive,” “leverage,” “seamless”
– No rhetorical questions
– No closing paragraph that summarizes what was just said
Example in use:
Here is my style guide: [paste contents]
Now write a 400-word post about why I switched from Notion to plain text files.
A short interview that produces a .md file you can download.
The questions should be:
- What are you writing? (blog, essays, emails, documentation, etc.)
- Who reads it?
- Describe your voice in 2-3 adjectives
- Name 3-5 words or phrases you never want to see
- What format rules matter to you? (headers, bullets, length)
You have full access to my Tools.
Let me know which ones you like the best.
The right order of operations: design brief first, copy second, and then the HTML
The prompt pulls both the design and copy together.
That’s how professional web projects actually work.
This is important: the copy slots you’ve named map directly to the image slots you already set up.
So the mental model stays consistent:
header.jpg          → HeaderCopy
(body section)      → BodyCopy
card1.jpg           → Card One Copy
card2.jpg           → Card Two Copy
card3.jpg           → Card Three Copy
calltoaction.jpg    → Call to Action Copy
Each image has a partner. Each section has both a visual and words. When they hand Claude the full prompt, they’re handing it a complete package: structure from the design brief, visuals from the image paths, and words from the copy blocks.
The prompt they end up writing becomes almost formulaic in a good way:
“Build a single HTML landing page using this design brief: [brief]. Use these image paths: [paths]. Use this copy: ©.”
That repeatability is worth pointing out directly in class. Once they’ve done it once, the process for the next client or the next niche is just swapping the three inputs. Same prompt structure, different brief, different images, different copy.
Uploading to Claude Design and pulling the .md (20 minutes)
Find a webpage design that you like and take a screenshot of it.
Upload your screenshot to Claude and ask it to produce a design specification in markdown. A prompt like:
“Analyze this page design and write a markdown file that describes the layout structure, color relationships, typography hierarchy, spacing approach, and visual hierarchy. Focus on the design system, not the specific content.”
You’ll get back something detailed.
Read it for a few minutes.
Ask:
What would change if you used different images?
What would stay the same?
Go to the next section: Building the HTML file.
If it is easy to change out the images without changing the text, you can create a landing page every day if you wanted to.
COPY CHANGES
If you want to create a new landing page, just change up the copy for the sections you have designed, and have Claude remake the page with new copy.
(OPTIONAL): Open up Visual Studio Code with the Greenlight Extension. Visually change the text easily without touching the code (the framework). You will be surprised how easy it is.
Building the HTML file.
Simplifying the .md into a reusable brief (20 minutes)
This process is an important step.
Paste the verbose .md back into Claude and ask:
“Simplify this into a concise design brief I can reuse. It should describe the layout sections, the visual hierarchy, the color approach (warm/cool/neutral, not hex codes), and the typography weight relationships. Remove anything specific to the original content. Keep it under 60 lines if possible. Make sure that it is all you will need to repeat the design. Add interesting animations and transitions (like Framer) where appropriate.”
What you will end up with should be portable.
Test it by asking Claude to build a landing page using only the brief and the image folder structure, without the original screenshot.
If the design feels like the same family, the brief worked.
Deploying to Netlify
Get a Netlify account (free is fine)
Netlify’s drag-and-drop deploy is very simple.
Drag the entire my-site/ folder onto the deploy zone.
The index.html at the root and the images/ folder inside it will work automatically.
Verify the live URLs for each image by checking the browser console for any 404 errors.
If images don’t load, it’s almost always a capitalization mismatch (e.g., header.JPG vs header.jpg).
Check the console before you freak out.
The Formula:
You have the file from the first prompt that explains your business.
We are now going to use that information for writing our text for the Landing Page.
Open Claude.
Give it the .md file we derived from this prompt on Page One:
If you have to do it again, it is this one:
I would like to create an overview of my business to add to my “about me” information for cold outreach emails, answering business queries, and formulating proposals to clients. Ask me 15 questions that will help you know exactly who I am and what I do for the basis of communications. Format this as a prompt I can answer. After we complete this interview, save it as a .md file.
Insert (drag) the .md file into Claude.
Then add this:
We are going to write the copy for my Landing Page.
My Landing Page is to feature my food photography.
I need:
A headline.
A subhedline
An Introduction: 2-3 paragrpahs about what I do and why I should do it for them.
Copy for Card One
Copy for Card Two
Copy for Card Three
An intro to testimonials (there will be three)
A call to action.
Write the copy and we will edit from there.
Ask any questiions you have before proceeding.
Response should have the copy clearly defined:
Headline Copy:
This is where the headline copy goes
Subhead Copy:
This is where the subhead copy goes.
And so forth.
Landing Page Brief
We are going to build a cool landing page from the copy and design brief below.
I have given you my copy in blocks that correspond to the images. Follow the design brief.
# Landing Page Brief
—
(Insert the design and copy brief here
## IMAGES
All images are in the /images/ folder with these exact file names:
– logo.png
– header.jpg
– card1.jpg
– card2.jpg
– card3.jpg
– calltoaction.jpg
Note: Replacement images must match the aspect ratio of the originals. Same file name, same shape.
Note: Logo colors should inform the Primary and Accent color choices above for a cohesive page.
—
## DESIGN STYLE
(Insert Design .md information here)
## BUILD INSTRUCTIONS
Build a single HTML file with embedded CSS.
Use the design style above to guide all visual decisions.
Pull images from the /images/ folder using the file names listed.
Structure the page in this order: Header, Introduction, Three Cards, Testimonials, CTA.
Place the logo in the header navigation area. Do not crop or resize it beyond fitting the nav container.
The page should work without any JavaScript frameworks or external dependencies.
Google Fonts is acceptable if it matches the font feel described above.
Do not use inline styles. All CSS goes in the style block.
Use width: 100% and height: auto on all images. Do not use object-fit: cover.
Use Framer-style animations and transitions when appropriate.
Links at the bottom of the page:
Don Giannatti Studios (https:www.dongiannatti.com)
In The Frame Substack (https://www.dongiannatti.substack.com
EMAIL: don.giannatti@gmail.com (mailto:don.giannatti@gmail.com
Give me a single HTML page that I can deploy at Netlify.
I will populate the images file locally.
Ask any questions before we start.
Keep the replacement images the same relationship when you upload them. (Landscape=landscape.)
CSS handles the display size, not the file size. A 1200px image will scale up or down to fit whatever container the code defines. The HTML and CSS control how it appears on screen; the original file stays untouched.
For the no-cropping goal, the CSS that works best for this is:
img {
  width: 100%;
  height: auto;
}
That tells the image to fill its container horizontally and scale its height proportionally. The full image always shows, no cropping, no distortion.
object-fit: cover is what you want to avoid.
It fills a fixed-height container by cropping whatever doesn’t fit, which is common in web design but not what you want here.
On keeping replacement images the same pixel size: that’s the right instinct, and here’s the practical reason. If a student’s original card1.jpg is 1200x800px (landscape) and their replacement is 1200x1200px (square), the card will change height on the page. Same file name, different proportions, different result.
So the rule is: match the aspect ratio, not just the pixel count. A replacement image doesn’t have to be exactly 1200px, but it should be the same shape as the original. Landscape for landscape, portrait for portrait.