
Claude CoWork One
Setting It Up Correctly.

Setting Up and Using Claude CoWork:
This is a ZIP folder with your structure already set up.
Docs/
Projects/
Design/ (.md notes)
About Me/
Project One/
Project Two/
Your First “Agent” (Image Renaming)
Put a set of images into a folder.
Put the folder into your Projects Folder.
Ask Claude to rename them in the order that you want.
What Claude gave me:
All 9 renamed, ordered oldest to newest by capture date (EXIF where available, file date otherwise):
utah-2026-1.jpg (was carwash), utah-2026-2.jpg (whitehouse), utah-2026-3.jpg (VLA-1-web), utah-2026-4.jpg (tree-canyon), utah-2026-5.jpg (skull-1), utah-2026-6.jpg (sunrise-2-saguaro), utah-2026-7.jpg (white-tree), utah-2026-8.psd (thefence-Edit), utah-2026-9.jpg (the-trailers).
One flag: the capture dates actually span 2010 to 2026, so a few of these (carwash, whitehouse, VLA shot) probably aren’t from an actual 2026 Utah trip. Worth mentioning to students, since this is a good real-world lesson: Claude will follow a naming pattern exactly as told, it won’t second-guess whether the content matches unless you ask it to check.
Before next class:
Ask Claude to hook up to your Google Docs.
This will take about 10 minutes. (Max)
Ask Claude to hook up to your Email.
This will take about 15 minutes. (Max)
Meeting Notes
Quick recap
This was a Claude CoWork training session led by Don Giannetti, where participants learned how to set up and use the desktop application for content creation and organization. Don demonstrated the proper folder structure, explaining that users should create a main “Claude Projects” folder on their desktop containing subfolders for design assets, About Me files, and individual projects with README files to provide context for Claude. The group practiced creating agents by having Claude rename image files in their flower photography folders, with Claude successfully identifying flower types and applying consistent naming conventions. Don showed how to connect Google Drive to Claude for document management and explained the difference between using Haiku 4.5 versus Sonnet 5 models based on task complexity and token usage. The session concluded with discussions about AI regulations and how everything from grammar checking to image editing tools is now being classified as AI under new European regulations.
Next steps
Debra
Don
Laura
luciana
- Download the provided project template zip file, extract it, and set up the “Claude Projects” folder structure on her computer.https://tasks.zoom.
us?meetingId=BZ% 2FRuKxBQpabLk1A374yVA%3D%3D& stepId=b1861071-9736-11f1- b9a8-be81e6038271 - Create a “Flowers” project folder on her desktop, add images to it, and connect it to Claude CoWork for renaming.https://tasks.zoom.
us?meetingId=BZ% 2FRuKxBQpabLk1A374yVA%3D%3D& stepId=b1861958-9736-11f1- 8c50-be81e6038271 - During the break, open Google Drive and add some documents to it as an exercise.https://tasks.zoom.
us?meetingId=BZ% 2FRuKxBQpabLk1A374yVA%3D%3D& stepId=b18623aa-9736-11f1- b48c-be81e6038271
Collaboration
Summary
Claude CoWork Setup Discussion
Don led a discussion about setting up Claude CoWork, explaining its functionality and benefits compared to the regular web-based Claude. He clarified that while the desktop application allows for local work and chat persistence, it doesn’t automatically sync across multiple computers. Luciana raised a concern about uploading larger files in the desktop version, noting that images sometimes don’t upload completely and recommend using the website version instead. Don acknowledged this issue and mentioned it could be related to internet speed, while noting he hasn’t experienced similar problems with Claude CoWork.
Claude CoWork Application Demo
Don demonstrated the Claude CoWork desktop application to the team, explaining its key features including projects, artifacts, scheduling, and dispatch functions. The team encountered technical difficulties with screen sharing and display sizes, which were resolved through Zoom settings adjustments. Don emphasized the importance of properly setting up the projects folder structure to avoid organizational issues, recommending either the documents folder or desktop as locations for the main projects folder.
Claude File Organization Structure
Don explained the file organization structure in Claude, demonstrating how to set up project folders with key components including design files, About Me documents, and README files. He showed how the README file provides context for Claude to locate specific project materials and maintain consistency with brand guidelines. Don emphasized that customizations should be made in the project README file rather than the main design file to avoid affecting future projects.
README MD Files Setup Guide
Don explained how to set up and use README MD files in Claude projects, clarifying that these files only need to be created once and can be reused across multiple projects to maintain consistency in logos, colors, and other design elements. He demonstrated how to create new folders within the Claude Projects system and showed the ability to point Claude at existing folders on the computer to perform tasks like unzipping and renaming files. The discussion concluded with Debra asking a question about not seeing her Claude Projects folder on the Claude homepage, though this part of the conversation was cut off in the transcript.
Claude Projects Setup Discussion
The team discussed setting up Claude Projects, with Don explaining that Debra needs to download and upload a specific folder to Claude Projects to create a new project. Don advised using the Haiku model for file renaming tasks as it uses fewer tokens compared to larger models like Sonnet 5. Laura shared a safety tip about manually allowing permissions in Claude rather than using “always allow” until users become familiar with the system.
AI Model Security Discussion
Don discussed the benefits of using simpler AI models like Haiku 4.5 for basic tasks instead of more powerful models like Sonnet 5, emphasizing cost efficiency and functionality. Luciana expressed concerns about security when granting AI access to devices, particularly regarding online banking, while Don and Laura reassured her by highlighting existing security measures and the limited access AI has to sensitive information without explicit permissions. The conversation also touched on broader data security issues, with examples of phishing scams and identity theft, but concluded that AI-specific security risks remain relatively low.
Privacy and Payment Security Discussion
The group discussed privacy concerns around sharing social security numbers and credit card information, with Laura advising that social security numbers are not needed for medical appointments and recommending Apple Pay and Google Pay for payment security. Don shared an experience of having his credit card information stolen in Utah, leading to a discussion about payment security practices. The conversation concluded with Don announcing they would build their first agent using Claude, though the specific details of this project were not discussed in the provided transcript segment.
Claude Image Renaming Workflow
Don demonstrated how to use Claude to automatically rename image files by creating a project folder and specifying renaming parameters. The group practiced setting up the process, with Luciana creating a “Flowers” project folder and Debra working with her own Claude Projects folder. Don explained that Claude can recognize images based on metadata and suggested testing the system with flower images by naming them with the flower type followed by the creator’s name for SEO purposes.
Claude Image Renaming Process
The team discussed how to use Claude to rename image files in a flower project folder. Don guided Debra and Luciana through the process of adding a folder in Claude CoWork and setting up prompts to rename files based on flower types and consecutive numbering. Laura planned to rename files with her business name and location but was advised by Don to simplify the file names due to length restrictions. The group successfully tested the functionality, with Debra noting how helpful this would be for organizing her photo collection, and Don emphasized the efficiency of using Haiku tokens for such tasks.
Photo Organization with Claude
The group discussed using Claude to automatically organize and rename photo files based on metadata. Don demonstrated how Claude can read camera metadata including EXIF data, lens information, and GPS coordinates to help sort and name images appropriately. Laura shared her experience using Claude to rename food photography files with SEO-friendly titles including business name, location, and commercial photographer designation, which she noted would have taken her half a day to do manually. The discussion concluded with examples of how Claude could be used for various photo organization tasks, including sequencing images for blog posts and organizing photos from external hard drives.
AI Photo Organization Workshop
Don demonstrated how AI tools like Claude can help with photo organization and editing, showing that while Claude can query and process images from Amazon S3 or exported JPEG files, it cannot directly access Lightroom catalogs due to database structure limitations. The group discussed different storage solutions including Amazon, Google Drive, and external hard drives, with Don recommending Amazon S3 as a cost-effective option for photo backup. The workshop took a break until 1 PM Pacific time, with instructions for participants to connect their Google Drive during the break if they choose to.
Claude Cloud Storage Integration Discussion
The group discussed integrating Claude with different cloud storage platforms like Google Drive and Notion to streamline workflows. Don explained how he uses Google Drive with Claude to automate tasks like compiling weekly AI-related content and managing blog posts. The team explored the challenges of EU regulations classifying various tools and processes as AI, leading to a broader discussion about the implications of these regulations. Don instructed participants to set up Google Drive connections with Claude as a practical exercise for the next class, with a follow-up meeting scheduled for 1 PM Pacific time.
ONE MORE MEETING
Sunday, August 22, 8 AM Pacific
Cowork + Google Drive: Class Run Sheet
Confirm Google Drive/Docs/Gmail are connected in Cowork settings before class starts.
Have one test doc already sitting in Drive.
1. Write in Claude, send to Google Docs
Setup:
Say to Claude: “Write a one-page intro to landscape photography and save it as a Google Doc.”
Process: Claude drafts the text, then creates the file directly in Drive. No copy-paste. Open the resulting doc live.
2. Build a mailing list from email
Setup: Gmail connected
Say to Claude: “Look through my inbox for the last three months and pull together a list of people I’ve emailed with more than twice. Put names and emails in a Google Doc.”
Process: Claude is reading real inbox data, not guessing. Good moment to talk about scoping (“last three months,” “more than twice”) so results stay usable.
3. Reorganize a messy doc
Setup: the test doc already in Drive (a rough brain dump or old notes file)
Say to Claude: “Open [doc name] in my Drive and clean it up: add headers, fix the order, make it easy to skim.”
Process: This edits the existing file rather than creating a new one. Show the before/after side by side.
4. Meeting notes into action items
Setup: none, paste in rough notes live (or use a real set from a past meeting)
Say to Claude: “Here are my raw notes from a client call. Pull out decisions and action items with owners, and save it as a Google Doc.”
Process: the gap between “notes” and “notes someone can actually act on.” This is usually the one that lands hardest with a small business audience.
5. Summarize across multiple docs
Setup: two or three related files already in Drive (old proposal, client notes, a contract)
Say to Claude: “Read through [doc A], [doc B], and [doc C] and write a one-page briefing that pulls together the key points.”
Process: this is the one manual copy-paste struggle with most.
6. Same thing, but with Word docs on the computer
Setup: a folder on the computer connected in Cowork, with one test .docx inside
Say to Claude: “Write a one-page intro to landscape photography and save it as a Word doc.” Then: “Open [doc name].docx in my folder and clean it up with headers.”
Process: no separate account to authorize, just a folder Cowork can see. Same drafting and editing behavior as Google Docs, just landing on the hard drive instead of Drive. Good spot to note that either path works, the students pick whichever matches where their files actually live.
Meeting Notes
Quick recap
The meeting focused on using Claude Cowork to connect and automate workflows with Google Drive, Notion, and Gmail. Don guided Debra, Laura, and Luciana through setting up connectors, resolving Notion connection issues, and structuring projects with README, About Me, and Design folders to save tokens. The group discussed writing blog posts from image folders, saving meeting notes, and using Chrome extensions like Save to Google Drive and Print Friendly to archive course content. They covered managing multiple email accounts, using Claude to analyze contracts and summarize documents, and briefly touched on video tools and cameras. Don also demonstrated Impeccable for design refinement and previewed upcoming work with Claude Code and Canva.
Next steps
Debra
Don
- Post the requirements for the next session (10 images for landing page) on the course page.https://tasks.zoom.us?
meetingId= 23HSr1DVSG6UJHPkFzsuPw%3D%3D& stepId=0da2bf12-975f-11f1- b39d-e6db8d119c3e - Share more information about using Notion as a web page/portal.https://tasks.
zoom.us?meetingId= 23HSr1DVSG6UJHPkFzsuPw%3D%3D& stepId=0da2c0cc-975f-11f1- a987-e6db8d119c3e
Luciana
Collaboration
- All participants: Prepare 10 images (header, footer, about me, services, and 8 gallery/portfolio images) for the landing page project in the next session.https://tasks.zoom.us?
meetingId= 23HSr1DVSG6UJHPkFzsuPw%3D%3D& stepId=0da2bbd5-975f-11f1- aab5-e6db8d119c3e - All participants: Connect Canva to Claude if not already connected.https://tasks.zoom.
us?meetingId= 23HSr1DVSG6UJHPkFzsuPw%3D%3D& stepId=0da2bd80-975f-11f1- a49b-e6db8d119c3e
Summary
Claude Integration Setup Discussion
The group discussed setting up connections between Claude and various tools like Google Drive and Notion. Don guided Debra and Luciana through the process of connecting these platforms, addressing issues they encountered along the way. They explored how to use Claude to create content from images stored in Google Drive, with Don explaining the importance of setting up an “About Me” document to personalize the content generation process. The discussion also touched on token management in Claude and ways to optimize token usage.
Project Folder Structure Setup
Don explained to Luciana how to set up a project folder structure using the README.md document, which should be placed in the individual project folder and contain details specific to each client including photographs, client details, and project information. Luciana clarified that her bio and about me content should be stored in the About Me folder, which Claude will reference when needed for different projects. Laura suggested using an app called Minimal for managing MD files, and Don confirmed that the README goes in the individual project folder rather than the main projects folder.
Claude File Organization System
The team discussed organizing files for Claude using a structured folder system with README files that direct the AI to specific content. Laura demonstrated how to set up the folder structure, showing where to place About Me content and design materials in separate markdown files within each project. Don explained that once the initial setup is complete, the same structure can be reused for future projects without repeating the setup process. The discussion also covered how Notion pages can be shared as web pages, creating customer-facing portals without additional costs.
Managing Multiple Email Accounts
Don explained how he uses Gmail to manage multiple email accounts by setting up POP accounts and aliases, allowing all emails to come into one inbox while maintaining separate business identities. Luciana expressed interest in learning more about this setup, and Don offered to share more details about using Gmail in this way. Debra shared her experience using Apple Mail with multiple email accounts organized into different folders, which she finds seamless despite managing several separate accounts.
Email and Drive Organization Tools
The group discussed challenges with managing multiple email accounts and Google Drive folders, with Debra sharing her experience of having four separate Google Drive accounts that had become unmanageable. Don demonstrated how to use Claude in Google Docs to organize and search meeting notes, suggesting it could extract key information and create linked resources. Don also showed a Chrome browser extension that allows direct saving of web pages to Google Drive, which Debra found useful for organizing course materials.
Chrome Extensions for Claude CoWork
The group discussed useful Chrome extensions for working with Claude CoWork, including Print Friendly and Save to Google Drive. Don demonstrated how these extensions can convert web content to PDFs and save them directly to Google Drive, which would be helpful for Debra who had been manually copying and pasting content into Word documents. Don also showed how Claude can analyze contracts and provide insights, suggesting users create specific MD files for different purposes like contracts, design specifications, and about pages within organized project folders to efficiently use tokens.
Video Equipment and AI Tools
Don shared his experience learning video work using new camera equipment, including an Insta360 Pro 2 and a phone camera, during his recent trip. He demonstrated how these cameras can capture high-quality footage in various conditions and discussed their advantages over traditional DSLR cameras for specific use cases. The group discussed using AI tools like Claude to automate tasks such as installing software through terminal commands and managing email follow-ups with unresponsive contacts. Don announced that the next class would focus on creating landing pages using improved Claude Code functionality, with students needing to prepare 10 images including header, footer, gallery, and service images for the workshop scheduled for 8 AM Pacific time the following day.
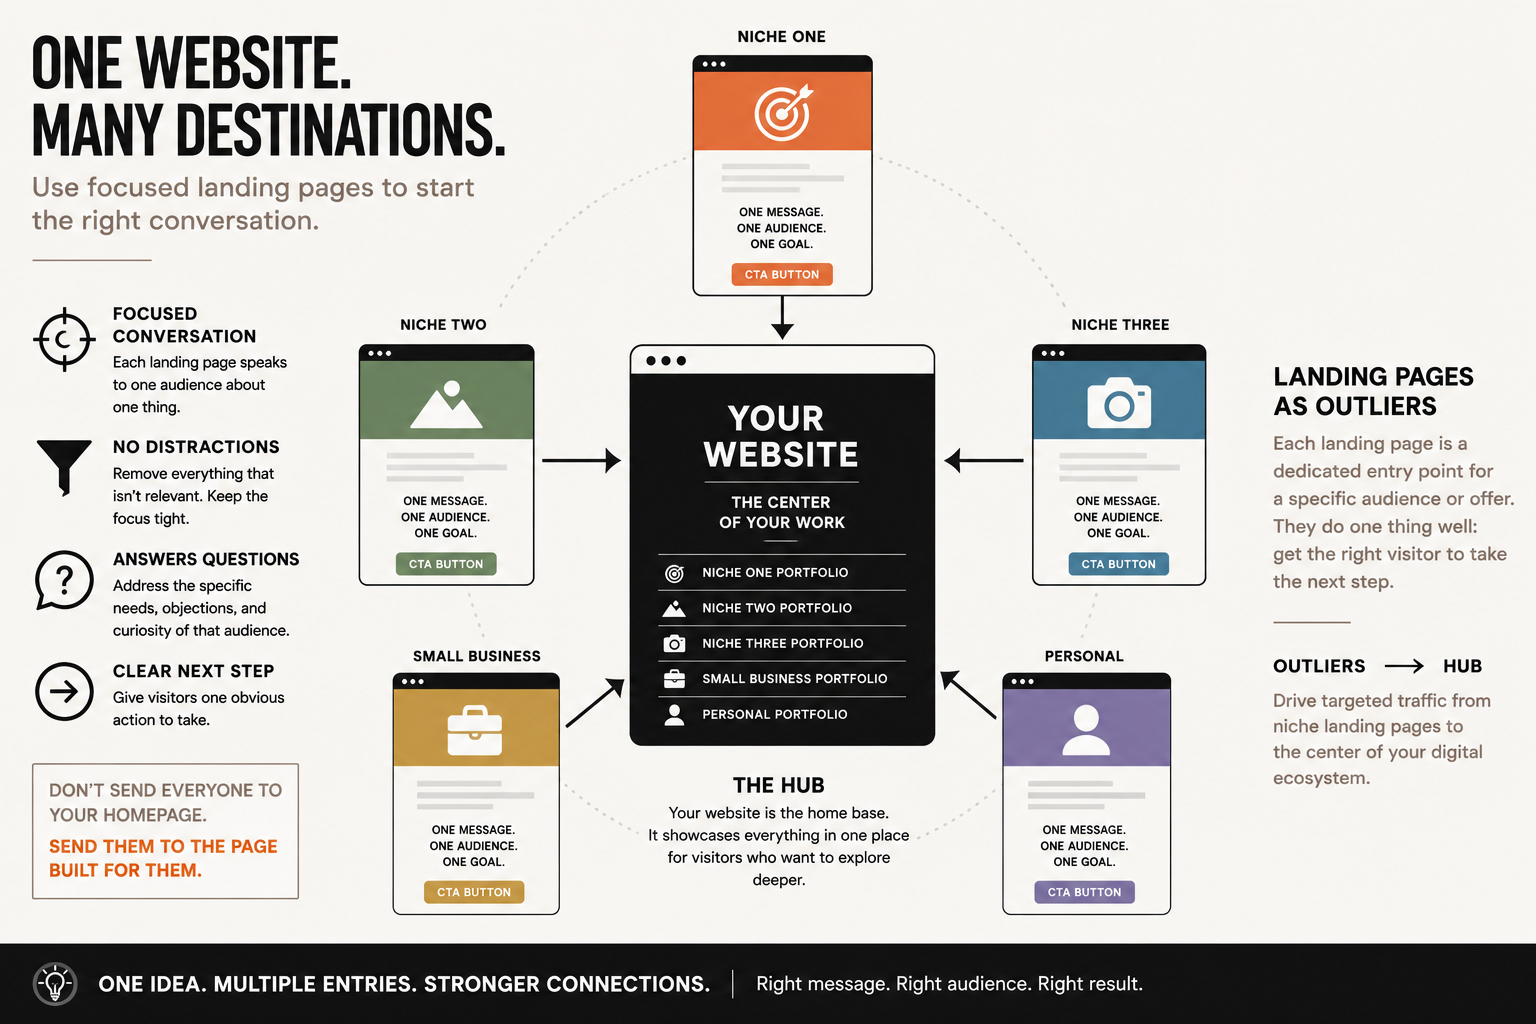
Here are five things you could actually do with Cowork and Notion, once you connect it.
First, client intake and project tracking. Say you shoot commercial gigs or headshots and want one place to see who’s booked, what’s owed, and what’s delivered. Cowork can build that database in Notion for them just by describing what they need in plain language: “track client name, shoot date, package, deposit paid, gallery delivered.” No formulas to learn, no templates to copy from a YouTube video.
Second, pulling contract and invoice info into a client record automatically. If you email contracts or have notes scattered across Gmail and your desktop, Cowork can read those files and drop the key details (client name, shoot date, amount owed) straight into a Notion page, so the you never have to manually retype anything into Notion’s interface.
Third, a simple content or shoot calendar. Instead of learning Notion’s calendar view and database relations themselves, you can just say “set up a shoot schedule for the next three months” and Cowork builds and populates it. They interact with Notion by looking at it, not by building it.
Fourth, turning a messy pile of notes into an organized shot list or client questionnaire. Photographers often have half-finished notes on what a client wants. Cowork can take those notes (a text file, an email thread) and structure them into a proper Notion page or template, formatted and ready to reuse for the next client.
Fifth, a running business log: expenses, mileage, gear purchases. Cowork can add entries to a Notion tracker as you mention them in conversation (“log that I bought a new lens for $800 today”), which sidesteps the intimidation of opening Notion and finding the right database and the right fields.
The common thread: you don’t need to learn Notion’s interface at all. Describe what you want in normal sentences, and Cowork does the database setup, data entry, and formatting inside Notion for you.
MEETING NOTES
Quick recap
The meeting focused on troubleshooting and learning how to use Claude Cowork and Claude Code for creating landing pages and presentations. Don explained the new folder structure required for projects, which includes separate About Me and Design folders containing MD files, plus a project-specific folder for each landing page. The group discovered issues with the landing page generation not appearing properly in Claude Code as expected, though it successfully created HTML files that could be viewed in browsers. They explored Claude Design as an alternative approach, with Laura demonstrating how to create mood boards and presentations using the organic template. The team discussed how to export and share their creations through various formats including Canva integration, and agreed to continue practicing with the tools before meeting again the following Sunday at 8 PM to delve deeper into advanced features.
Next steps
Debra
Don
Laura
luciana
Collaboration
- All participants: Play with Claude Design and Code to create and adjust presentations or landing pages, and prepare to show progress during the next meeting.https://tasks.zoom.us?
meetingId=8SWBm% 2FO4SaKoU4494czKNA%3D%3D& stepId=5120e905-98d0-11f1- b20c-9a00cdacf124 - All participants: Attend the next meeting on Sunday at 8:00 (same Zoom link) to review progress and learn advanced techniques.https://tasks.zoom.
us?meetingId=8SWBm% 2FO4SaKoU4494czKNA%3D%3D& stepId=5120eab1-98d0-11f1- 9e43-9a00cdacf124
Summary
AI Detection and Content Organization
The group discussed the current challenges with AI detection and transparency in content creation. Don shared his experience using Substack and Claude to automate content curation, demonstrating how AI detection tools can incorrectly flag content as AI-generated. The discussion highlighted the public’s limited understanding of AI capabilities and the difficulty in properly categorizing content that uses AI tools. The conversation then shifted to clarifying the structure for organizing files in Claude Cowork, with Don explaining how to properly set up project folders containing design specifications, about me content, and copy for different projects.
Claude Landing Page Setup
Don demonstrated how to use Claude Online to create landing pages by pasting business information and design elements into the platform. Luciana explained her organization system where project folders contain specific images while the “About Me and Design” folder remains universal across all projects. The discussion concluded with Don setting up a new folder structure in Claude for a landing page project, with Debra confirming she had the necessary API key.
Project Organization and File Management
The team discussed project organization and file management in Claude. Don explained how to properly structure project folders and README files, emphasizing the need to update template instructions and organize project materials including photographs. Laura confirmed she had made a copy of the original README file and updated it with relevant information about her design work.
Project Folder Organization Standards
The team discussed the organization of project folders for Claude. Laura created a “Sample Projects” folder with a master README that will be used as a template for future projects. Don clarified that project folders should contain three subfolders: Design, About Me, and Project, with the README and other master files stored in the Design folder. The team agreed that all project-specific files, including images, should be placed in the project folder rather than separate folders outside the main project structure.
Landing Page Creation Process
The team discussed the process for building a landing page using Claude Code. Don clarified that participants only need to include their project files in the designated folder, with master folders in the About and Design sections serving as references. The group confirmed they don’t need an API key if using Claude, and Don explained that the landing page will be generated as an HTML file. Don provided guidance on the prompt format, suggesting participants say “create a landing page for my photography business from the assets in this folder,” noting that modern AI systems don’t require elaborate prompts as they learn from previous interactions.
Claude Code Project Setup Discussion
The team discussed setting up a project folder in Claude Code and configuring it for their design work. Don recommended using Sonnet Medium instead of Haiku 4.5 for better design quality while conserving tokens. Laura encountered an issue with folder organization and decided to create copies of necessary folders to simplify the process. Debra had trouble accessing the token usage display and was directed to switch from Claude Cowork to Claude Code for proper functionality.
Web Image Display Technical Issues
The group discussed technical issues with displaying images in a web page. Laura explained that the environment sandbox restrictions prevented relative image paths from working properly, so she decided to inline images as embedded data to make the page self-contained. Don suggested placing all images in a folder named “images” and linking to them instead. Debra experienced display issues in the preview pane, which she attributed to the static image snapshot rather than live loading, but confirmed that clicking the index.html file would open it properly in a browser.
Landing Page Technical Issues
The team reviewed a landing page generated from their project folder, but encountered issues as it didn’t open in Claude Code as expected, preventing direct editing. Don identified this as a technical problem that needs investigation before they can make the desired changes to elements like photo orientation and layout. The team rescheduled their next meeting to Sunday at 8 PM to address these issues, with Don committing to resolve the Claude Code integration problem in the meantime.
Design Feature Transition Training
Don explained that the team should transition from using code to using the Design feature in their tool, which will allow them to convert notes into presentations and create landing pages. Laura demonstrated how to use the Design feature by creating a mood board, showing participants how to select templates and customize elements like colors and images. The team learned they can create various design elements including landing pages, identity pieces, and media kits, with Don confirming that next week they will receive guidance on using Design together as a group.
Claude Design Presentation Features
The team discussed using Claude’s design features to create presentations from website assets. Debra demonstrated how to create a five-slide presentation by uploading a folder containing website assets, which successfully generated slides that matched her landing page design. The group explored export options including Google Slides, PowerPoint, and video formats, with the ability to connect Claude designs to Canva for additional editing capabilities. Don scheduled a follow-up meeting for next Sunday at 8:00 PM to demonstrate more advanced features of the design tool.
Module Three
Claude Design:
Assets needed:
12 images:
header.jpg (1500 px by 1000 px)
footer.jpg (1500 px by 500 px
service.jpg 1000 pxby 1000 px
—
(Alternate: 3 services
You can have three if you want.
service-1.jpg
service-2.jpg
service-3.jpg
—
about.jpg (1000 px by 1000 px)
gallery1.jpg 900×600 px
gallery2.jpg 900×600 px
gallery3.jpg 900×600 px
gallery4.jpg 900×600 px
gallery5.jpg 900×600 px
gallery6.jpg 900×600 px
gallery7.jpg 900×600 px
gallery8.jpg 900×600 px
A design .MD
Use this tool if you do not have one.
A style (About Me) .MD
Use this tool if you do not have one.
Text for your Landing Page
Use this tool to help you get what you need.
landing-page-builder-v2-2 2.html
Paste in your Anthropic API key at the top.
Claude Design: Four Levels
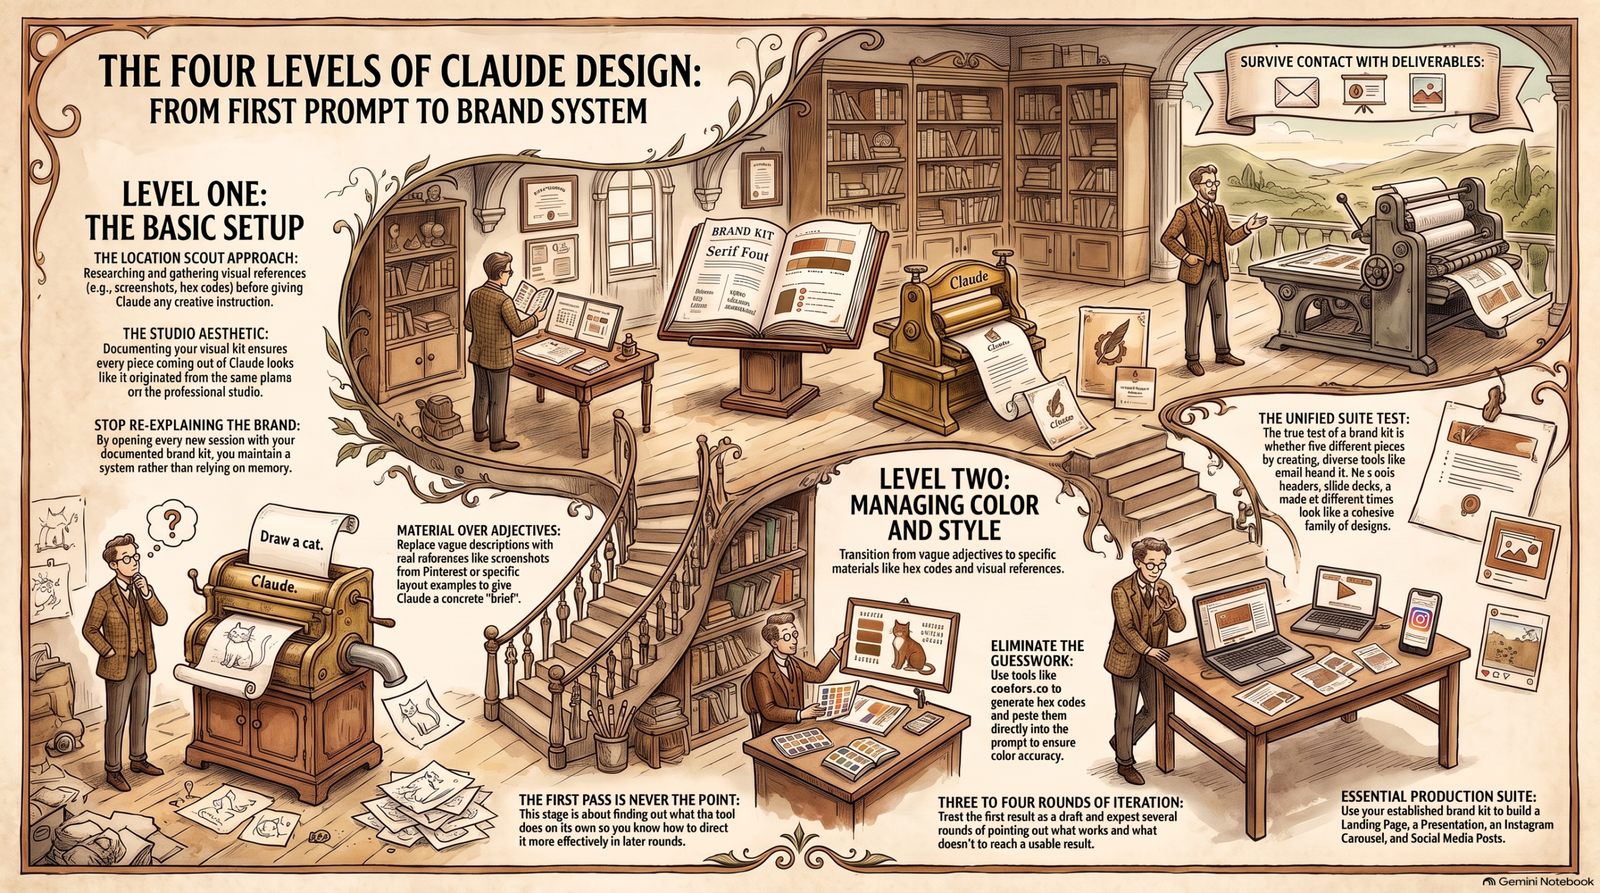
Level One: Basic Setup
Nobody needs a design brief to start. Open Claude, describe one thing you want (a landing page, an app screen, a poster layout) in a sentence or two, and look at what comes back. That first pass is never the point. The point is watching how Claude turns a plain sentence into layout, spacing, and type choices, so you understand the mechanism before you start asking it to hold an entire brand across twenty pieces.
Treat it the way you’d treat handing a location scout to a new assistant with no shot list. You’re not expecting a usable result yet. You’re finding out what the tool does on its own, so you know what you actually need to direct once you start giving it real instructions.
Production
We are going to give Claude Code a single-line, first-generation prompt. We need it for a base.
Level Two: Managing Color and Style
A single prompt gets you a design. A brief gets you something you can use. This level is about feeding Claude real material instead of adjectives: screenshots from Pinterest or Awwwards, a layout you already like, an actual reference instead of a description of one. Be specific about what you borrow. “Like this” isn’t a brief.
Color works the same way. A site like coolors.co builds a workable palette in seconds. Paste the hex codes straight into the prompt and you’ve removed the guesswork Claude would otherwise be doing on your behalf. And treat the first result as a draft, not a final. Three or four rounds pointing at what’s working and what isn’t is normal, the same as any shoot.
Production
Create a color palette.
Level Three: Building a Brand Kit
Once the color and style choices are actually working, write them down: type, palette, spacing, a handful of tone words. That written reference is what you open every new session with, instead of re-explaining the brand from memory each time. That’s a design system, and what it buys you is consistency, not speed. Every piece coming out of Claude should read as if it came from the same studio, without you rebuilding the brand from scratch in every prompt.
This is where the first two levels pay off. Level one showed you what Claude does with a plain request. Level two taught you how to hand it something specific. Level three is where you stop starting from zero every time.
Production
What’s actually in your visual kit right now? Is it written down somewhere so you could hand to someone else, or just living in your head. If it’s only in your head, it isn’t a system yet.
Level Four: Promotional Tools That Hold the Brand
A brand kit only proves itself once it survives contact with real deliverables. This level points that same palette, type, and tone at the things people actually see: an email header, a social graphic, a slide deck, a one-page flyer. The test isn’t whether any single piece looks good on its own. It’s whether five different pieces, made in five different sessions, look like they came out of the same studio.
Same iteration rule as before. First pass, feedback, a second pass that’s closer. What you’re learning here is the same discipline as building a client leave-behind or a full promo kit, just compressed from days into minutes.
Production
Using your brand kit, build a suite of tools for use in your business: Landing Page, Presentation, Instagram Carousel, Social Media Posts